Master 5 Geometric Henna Motifs for Minimalist Moroccan Looks
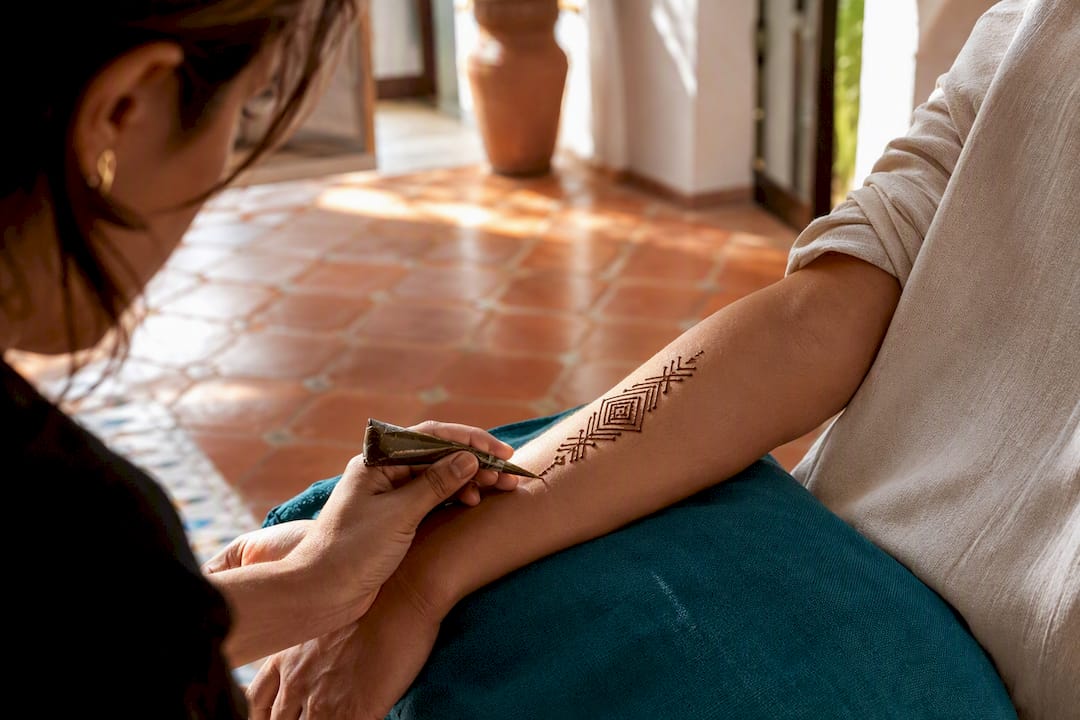
Geometric henna is the style built from triangles, diamonds, grids, and hexagons instead of vines and florals, and it has become the dominant look in modern mehndi because it’s easier to plan, faster to execute, and reads sharp in photos. This guide shows the core styles worth trying, then breaks the actual motifs (diamonds, triangle clusters, chevrons) into steps you can practice today, plus the placement and aftercare details that make a geometric piece hold its shape and its color.
TL;DR:
Geometric henna patterns are based on simple shapes like diamonds, triangles, and hexagons, making them easier to plan and faster to apply than floral designs.
Precision, slow movement, and practicing anchor points are crucial to maintaining symmetry and achieving clean lines in geometric motifs.
Using high-quality, well-prepared henna paste and proper tools, such as a rolled cone, ensures crisp, dark lines and long-lasting results.
Placement and scale are vital; motifs should be sized appropriately for the body part, with negative space enhancing visual clarity and balance.
Practice with stencils, templates, or guided lessons can significantly improve technique and control faster than freehand trial and error.
Table of Contents
Geometric Henna Design Styles to Know Before You Pick One
Most geometric henna traces back to Moroccan tilework, where repeating triangles, diamonds, and tessellations covered walls and floors long before they appeared on skin. Modern artists translated that geometry into both minimalist and dense mehndi patterns, and knowing which variant you’re drawn to will save you a lot of false starts.
Minimalist Moroccan: A single strong motif (often one large diamond or a linear lattice) surrounded by bare skin. The negative space carries the design, so precision matters more than volume.
Diamond or grid work: Rows of diamonds or a crosshatched grid, usually run down the back of the hand or wrapped around the wrist like a cuff.
Triangle clusters: Small triangles grouped in fans or pyramids, often anchored at the base of a finger or the center of the palm.
Hexagon tessellation: Interlocking hexagons that tile edge to edge, giving a honeycomb effect that reads as more intricate henna designs even with simple shapes.
Finger bands: Thin geometric rings circling one or two fingers, popular for everyday wear because they’re quick to apply and easy to touch up.
Wrist and arm cuffs: A wide geometric band that mimics a bracelet, common at weddings where the bride wants coverage without a full-hand piece.
Dense variants stack these motifs edge to edge for bridal or ceremonial looks, where geometric elements often mix with florals and lace. Minimal variants do the opposite, isolating one motif so it photographs like a piece of jewelry rather than a tattoo.
How to Draw Core Geometric Henna Motifs Step by Step
Every one of these motifs breaks down into anchor dots and straight connecting lines, which is why tutorial collections simplify complex geometric mehndi art into repeatable pieces instead of teaching them as one continuous drawing.
Diamond: Mark four dots forming a small square rotated 45 degrees. Connect the top two dots, then the bottom two, then close both sides. Keep the diamond’s width equal to its height for a clean look.
Diamond grid: Repeat the single diamond in a row, leaving a gap equal to half a diamond’s width between each one. Add a second row offset by half a diamond to create a honeycomb feel instead of a flat strip.
Triangle cluster: Draw one larger triangle as the anchor, then two or three smaller ones fanning out from one corner. Fill every other triangle solid and leave the rest outlined for contrast.
Hexagon: Sketch six dots in a circle, evenly spaced, then connect them in order. Practice this on paper first since hexagons drift out of shape faster than diamonds when you’re new.
Chevron finger band: Draw a “V” shape wrapping the finger, then stack two or three more V’s above it, each slightly smaller. This is the fastest motif to master and the easiest for finger henna designs.
Work slowly and keep the cone moving at a constant speed. Speed changes are what cause wobbly lines, not shaky hands. A stencil or a light pencil grid on the skin removes most of the guesswork while you’re still building muscle memory, and practicing anchor points on paper before moving to skin trains the hand stability geometric work demands. The most common mistake is rushing the connecting lines between dots, which leaves gaps that break the symmetry the whole style depends on. If a line comes out crooked, don’t try to fix it mid-stroke. Let it dry, then draw a clean line over it once you’ve steadied your hand.
Pro Tip: Draw your full grid of anchor dots before you fill in a single line. Committing to the connecting strokes too early is the number one reason beginner geometric designs end up lopsided.
Tools and Paste Prep That Keep Lines Crisp
Sharp geometry depends more on your tools than your talent. A rolled cone gives the most control for fine straight lines and is what most experienced artists reach for. Applicator bottles push out paste faster, which suits filling large triangles or diamonds but makes thin outlines harder to control. Syringes sit in between, useful if you’re working with a thicker paste consistency.
Fresh henna paste should have the texture of soft frosting. Test it on your wrist before starting a full design.
Paste that’s too thin will bleed and blur your geometric edges within minutes.
Strain the mix through a fine cloth to remove grit that clogs cone tips mid-line.
Skip anything labeled “black henna.” It’s frequently mixed with undisclosed chemical dyes that can cause skin reactions, unlike natural henna paste.
Set up on a stable, well-lit surface and rest your drawing hand against your other hand or a table edge for support.
Practice five straight lines and five diamonds on paper before every skin session, even once you’re confident.
Placement, Scale, and Composition for Geometric Henna
Geometric motifs need to fit the canvas they’re drawn on, and scale is where a lot of beginner designs go wrong. A diamond that looks balanced on the back of the hand will overwhelm a single finger.
Size finger motifs to roughly one third the width of the finger, leaving margin on both sides.
On the hand, center a focal motif at the base of the fingers or in the palm’s center, then let smaller shapes trail outward.
Wrist cuffs work best between 1 and 2 inches wide, wrapping fully around rather than stopping at the inner wrist.
Try a panel layout (one boxed design running up the back of the hand), a diagonal trail (motifs decreasing in size toward the wrist), or a single focal piece surrounded by open skin.
To soften a geometric design without losing structure, add one small floral dot or a curved vine at the outer edge only, never inside the geometric shape itself.
Negative space does real work here. Minimalist Moroccan panels photograph sharply precisely because the bare skin around the motif gives the eye somewhere to rest.
Aftercare Tips for a Dark, Long-Lasting Geometric Stain
Leave the paste on for at least four to six hours, longer if you can manage it, since geometric fills need even color across large solid areas to look intentional rather than patchy. A light dab of a lemon and sugar mix can help the paste stay adhered to skin, but apply it sparingly. Too much liquid causes the paste to slide and blur your straight edges.
Scrape off dried paste rather than washing it, and avoid water for the first several hours.
Touch up thin outlines or small fills within the first week if the color looks uneven, since geometric lines show gaps more obviously than curved floral work.
Steer clear of any henna product marketed as fast, jet black, or chemical. That’s the caution about black henna worth repeating here, since skin reactions from undisclosed additives are a real risk.
Henna is a plant-based tradition valued as much for the calm, creative process of applying it as for the finished stain, and geometric styles in particular reward the patience that process takes.
Where to Practice Geometric Henna With Real Feedback
Reading about anchor points only gets you so far. Henna For Fun runs private and small-group henna lessons where you practice diamonds, grids, and chevrons with someone correcting your line pressure in real time, plus Whenna Events at wineries and private homes where guests apply geometric designs together in a low-pressure setting. If you’d rather build muscle memory solo, stencils and templates close the gap between a shaky first attempt and a clean finished piece far faster than freehand trial and error. For simple starting points before a full lesson, browse beginner-friendly motifs you can try with a basic cone.
Why Geometric Henna Clicked With a New Generation
Geometric henna caught on because it strips mehndi down to its most confident element: line control. You don’t need years of floral vocabulary to make a diamond grid look finished, and that accessibility is exactly why contemporary artists have leaned into modernizing the craft without abandoning where it came from. Practice the shapes, but learn a little about henna’s cultural roots too. A DIY henna kit or a lesson is a fine place to start that respect.
— Angana
Learn Geometric Henna With Guided Lessons or Book a Whenna Event
Reading tutorials teaches you the shapes. Getting someone to correct your cone pressure in the first ten minutes is what actually stops the wobble. Henna For Fun’s 3-day and 5-day lessons walk you through diamonds, grids, and hexagon tessellations with hands-on correction, stencils, and a henna mixing and cone making session so you leave knowing how to prep your own paste, not just apply someone else’s.

If you’d rather practice geometric designs in a group setting than alone at your kitchen table, a Whenna Event brings an artist to a winery, a home, or a private party so everyone gets a design and a little instruction along the way. Pricing typically starts at a basic rate per participant, with additional options available for custom designs per guest. Check open dates and book a session through the Whenna Events page to get started.
Sources
FAQ
Is doing henna racist?
No, henna itself is a shared tradition across many cultures, but applying it thoughtlessly, without any awareness of its South Asian, Middle Eastern, or North African roots, can read as careless. Learning the basics of where a style comes from, which artists like those Vogue profiled actively encourage, is the respectful approach.
What are the trends in mehndi design for 2026?
Minimalist Moroccan geometry, negative-space panels, and finger bands are leading the trend list, favored for how cleanly they photograph and how quickly they can be applied compared to dense traditional coverage.
What does the Bible say about henna?
Henna is not directly addressed in the Bible by that name, though some scholars connect it to the plant referenced as “camphire” in the Song of Solomon. It’s treated primarily as a fragrant, decorative plant rather than a subject of religious instruction.
What are some popular geometric henna patterns?
Diamond grids, triangle clusters, hexagon tessellations, and chevron finger bands are the most requested geometric mehndi patterns, largely because each one breaks down into simple, repeatable shapes beginners can learn quickly.
How much do henna lessons cost?
Henna For Fun’s 3-day lesson is $111 and the 5-day lesson is $179, both covering core motifs, and a separate henna mixing and cone making session runs $99. Full details are on the lessons page.
Recommended
Comments