Learn Henna Art: A Practice-First Plan for Beginners
- angana0403
- 1 day ago
- 9 min read
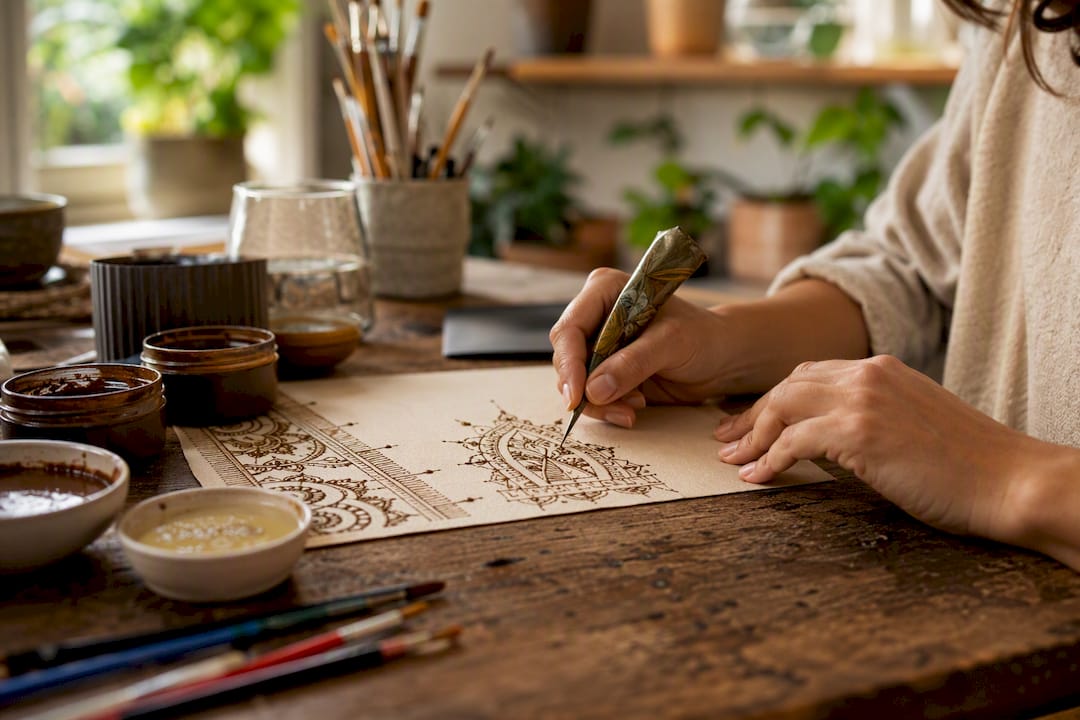
Yes, you can learn henna art, and you don’t need years to get there. Practice 10 to 20 minutes a day on paper, and most beginners produce clean, confident designs in 4 to 6 weeks. The formula is simple: steady motor practice, correct paste, and careful aftercare. That combination is what separates a smudged first attempt from a stain people ask about.
Start tonight, not next week:
Draw lines, dots, and simple curves on paper for 10 minutes.
Get a fresh, natural henna cone or mix a basic paste (details below).
Patch test on your inner forearm and wait 24 hours before applying anywhere else.
Pro Tip: Keep a cheap notebook just for henna drills. Flipping back through week one versus week four is the fastest way to see real progress and stay motivated.
Key Takeaways
Learning henna art reliably comes down to short daily drills, safe natural paste, and patient aftercare, not raw artistic talent.
Point | Details |
Practice daily, not occasionally | 10 to 20 minutes of daily drills beats longer, infrequent sessions for building steady hand control. |
Master four strokes first | Lines, dots, humps, and spirals form the base of every design; drill them before attempting florals. |
Avoid black henna entirely | Skip any paste promising instant black stains; it likely contains PPD and risks skin damage. |
Aftercare decides stain depth | Sealing with lemon sugar and avoiding water for the first day deepens color over 24 to 48 hours. |
Hennaforfun offers a faster path | Private lessons and starter cones from Hennaforfun compress the self-study timeline with real feedback. |
Table of Contents
Henna for Beginners: Materials and Safety First
Before you touch skin, know what you’re working with. Real henna paste is dark green to brown and smells earthy, like spinach or hay. Black henna, often sold at tourist markets and beach stands, usually contains PPD (para-phenylenediamine), a chemical that can cause chemical burns, permanent scarring, and lifelong allergic sensitivity. If a paste promises a jet black stain in under an hour, walk away from it.
Your starter kit doesn’t need to be expensive:
A natural henna cone or fresh paste (avoid anything jet black or unusually fast-staining).
Practice sheets or plain paper, plus a smooth piece of glass or plastic to trace over.
Tissues or cotton swabs for cleanup, and strong, direct lighting.
Always patch test first. Apply a small dot of paste to your inner forearm, leave it for a few hours, and check for redness or itching over the next 48 hours before doing a full design. Store leftover paste in an airtight container in the refrigerator and use it within a few days. Old, dried-out paste is the number one reason beginners get weak, orange-only stains instead of rich brown ones.
What Basic Strokes Should You Practice First?
Every henna design, no matter how complex, breaks down into four foundational strokes: lines, dots, humps, and spirals. Master these before you touch a single flower motif.
Lines. Practice steady, unbroken lines across a page for 10 to 15 minutes. Focus on consistent pressure, not speed.
Dots. Drill rows of evenly sized dots. Uneven dots are the fastest tell of a beginner design.
Humps and fishbones. These curved, connected shapes form the backbone of most floral and vine patterns, and pattern ebooks built around elemental strokes teach exactly this kind of repetition before any full design work.
Spirals. Practice tight, controlled spirals that don’t wobble as they close.
Progress through four stages: paper first, then tracing over glass or plastic, then cone-on-paper to get used to the flow of paste, and only then cone-on-skin. Don’t rush the jump to skin. Professionals consistently point to paper practice as the step that produces steady, continuous lines later.
Here’s a realistic six-week arc: by week 2, expect steady parallel lines and even dot spacing. By week 4, aim for a basic floral motif with connected humps and consistent line weight. By week 6, most learners can freehand a simple mandala or vine border without tracing first.
Pro Tip: If your lines still wobble after two weeks, slow down before you speed up. Shaky lines are almost always a pressure problem, not a skill ceiling.
How Do You Make or Fill a Henna Cone?
A simple starter paste needs henna powder, a warm acidic liquid (lemon juice or strong tea work well), a few drops of an essential oil like lavender or cajeput, and a pinch of sugar for stickiness. Mix to a smooth, yogurt-like consistency and let it rest, covered, for 12 to 24 hours so the dye releases fully.
Filling a cone takes practice of its own:
Spoon paste into a plastic cone or repurposed piping bag, pushing out air pockets as you go.
Cut the tip small for fine detail work, or slightly wider for bold outlines and fill work.
If paste clogs mid-line, the tip is usually cut too small or the paste has bits of undissolved powder. Sift your henna powder before mixing to avoid this.
If you’d rather skip mixing entirely, buying pre-made cones is completely reasonable for beginners. Check the ingredient label for natural henna, essential oil, and lemon or sugar. Any cone listing PPD or promising an instant black stain is not natural henna, no matter what the packaging says.
Which Practice Tools Actually Speed Up Learning?
Printable practice sheets solve a real problem: they let you rehearse patterns without burning through paste or skin. Guided practice pages built around progressive exercises help you drill one stroke type at a time instead of jumping straight into full designs, and Hennaforfun’s own practice sheets for beginners work the same way.
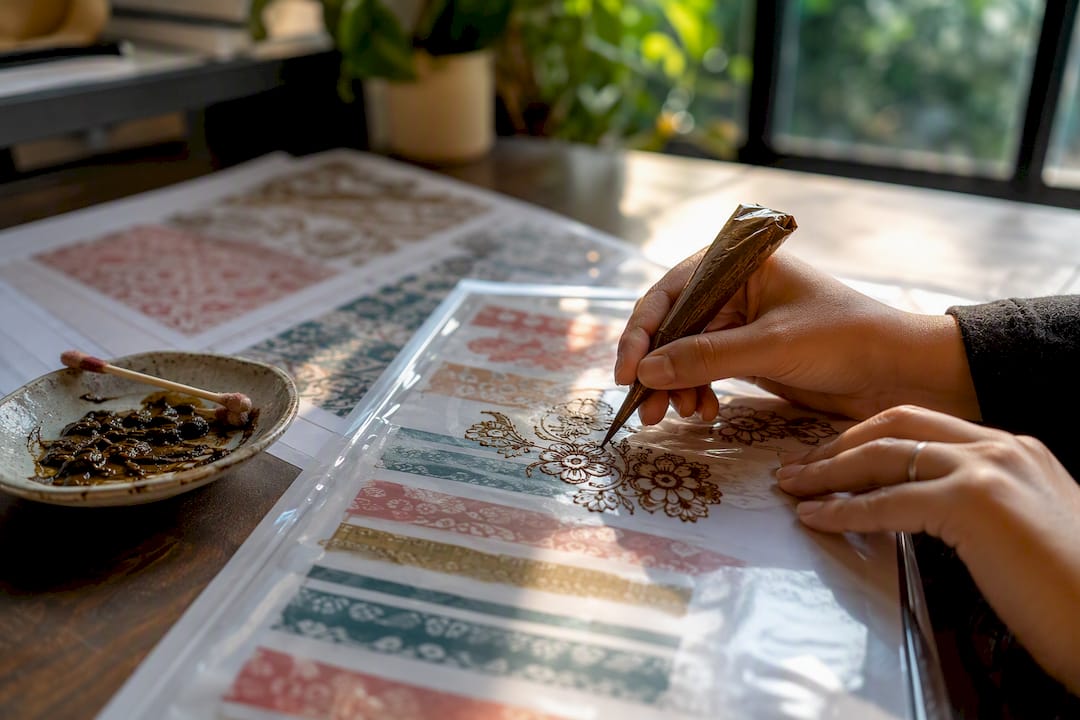
A glass or plastic overlay is the underrated tool here. Lay it over a printed template, trace the design with a cone loaded with paste, and you get real cone-handling practice with zero pressure about ruining the paper underneath.
Paper drills | Glass/plastic tracing | Cone on skin | |
Best for | Stroke fundamentals | Cone control | Real stain practice |
Mistake cost | None | Low (wipe and redo) | High (stains last days) |
Move on when | Lines are steady | Paste flows evenly | Confident with both above |
Move from tracing to freehand once you can complete a template’s outline without lifting your eyes from the page more than once or twice. If you’re still constantly checking the template, you’re not ready to drop it yet.
Applying Henna and Getting the Best Stain
Clean, dry skin absorbs henna dye far better than skin with lotion or oil residue, so wash the area and let it air dry completely before you start. Any barrier between paste and skin, even an invisible one, blocks dye penetration and gives you a patchy result.
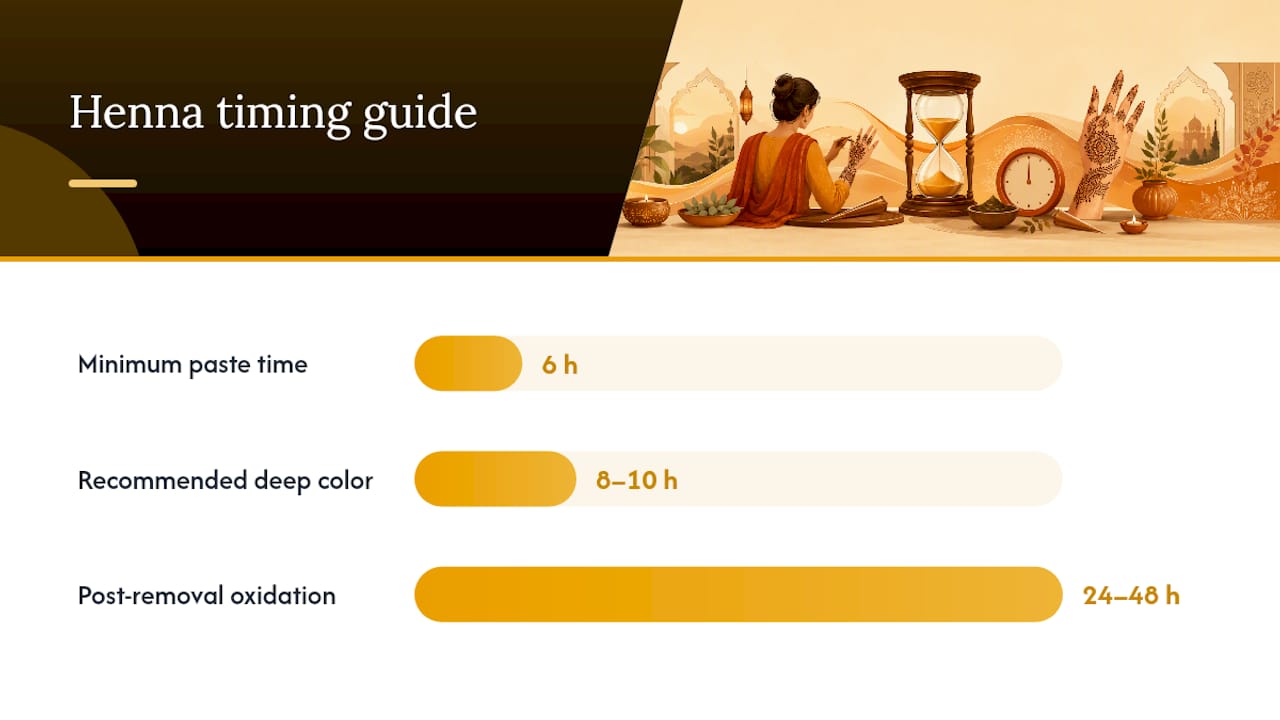
Once the design is applied, sealing it matters more than most beginners realize. A light dab of lemon juice mixed with sugar, applied over the dried paste, keeps it tacky and extends wear time, letting the dye keep releasing into the skin for hours longer. Aim to leave the paste on for a minimum of 6 hours, though 8 to 10 or more gives noticeably deeper color.
When you’re ready to remove it, scrape the dried paste off rather than washing it away. Rubbing in a little oil afterward helps the surface set. Here’s what to expect next:
The stain starts pale orange the moment paste comes off.
It darkens over the following 24 to 48 hours as the dye oxidizes.
Avoiding water for the first several hours after removal noticeably deepens the final color.
Patience during this window matters more than any product you apply. A design that looks disappointingly light an hour after removal often turns rich mahogany brown by the next evening.
Self-Study, Online Classes, or In-Person Workshops?
Your best learning path depends on your goals, not just your budget. Casual hobbyists who want a creative outlet do fine with self-study: practice sheets, a couple of cones, and a six-week roadmap covering the strokes and milestones above.
If you want deeper design skills and real feedback on your work, structured online classes fill that gap. Courses that combine cone prep, technique drills, and full-hand practice modules tend to move learners past the plateau that self-taught artists often hit around week three or four.
Workshops and private lessons are the fastest route if you want live correction. Watching a hand move in real time and getting immediate feedback on pressure and pacing fixes bad habits before they set in, which matters most for anyone hoping to eventually work events professionally.
Before choosing, ask yourself: How fast do I want results? How often do I want feedback? Am I working toward paid gigs, which may eventually require liability insurance? Your answers point to the right format faster than any pros-and-cons list.
How Henna for Fun Teaches Real Skills
Angana, founder of Hennaforfun, built the brand’s teaching approach around the same practice-first logic covered throughout this guide: short drills, clear milestones, and real feedback before real stakes. That shows up across the brand’s formats, from interactive Whenna Events at wineries and homes to private lessons and Pregnancy Henna sessions for expectant parents marking a milestone.
Students who complete private lessons typically report two concrete outcomes: steadier line control within the first couple of sessions, and enough confidence with core motifs to freehand a simple design without a template.
A student who can trace confidently but freezes when the template disappears hasn’t finished learning yet. The goal of any lesson is to make the paper unnecessary.
Learning outcomes map directly onto the same weekly milestones outlined earlier. Guided instruction just compresses the timeline.
What Beginners Get Wrong About Learning Henna
Most henna advice treats design complexity as the goal, pushing beginners toward intricate bridal-style patterns before they’ve earned steady hands. That’s backward. The artists who progress fastest spend real time on boring drills, plain lines, even dots, tight spirals, before they ever attempt a flower. Skipping that stage doesn’t save time; it just moves the struggle later, into a design that matters more.
The other overrated piece of advice is treating stain color as a paste problem. It’s usually an aftercare problem. I’ve seen identical paste produce a pale stain on one arm and a deep mahogany one on the other, purely because one person avoided water longer and sealed the paste with lemon-sugar.
If you take one thing from this guide, prioritize consistency over ambition for the first month. A daily 10 minute habit with plain lines beats a weekend binge on complicated florals every time. Once your hand is steady, complexity comes fast, often faster than beginners expect.
Ready to Skip the Trial and Error?
Everything above works if you’re patient and consistent. But if you’d rather compress six weeks of trial and error into a couple of guided sessions, Hennaforfun offers a faster route: private lessons where an experienced artist corrects your grip, pressure, and pacing in real time, instead of you guessing from a worksheet alone.

Whether you want one-on-one instruction, a group experience at a Whenna Event, or a starter kit to practice at home between sessions, there’s an entry point that fits your budget and pace. Hobbyists who want to build a foundation start with private art lessons in the Kirkland, Bellevue, and Snohomish area. If you’d rather practice solo first, pick up a handmade henna cone made with natural ingredients, no guessing about what’s in the paste.
Book a lesson slot or grab a starter cone this week, and give your next 10 minute practice session a real head start.
Practice Resources Worth Bookmarking
A few pages are worth keeping open while you practice:
Beginner henna workbook and practice sheets for guided stroke drills.
Free elemental pattern ebooks covering humps, fishbones, and wibbleleaf shapes.
Hennaforfun’s printable practice sheets for structured daily drills.
Floral henna design templates once your fundamentals are steady.
Frequently Asked Questions
How long does it take to learn henna art? Most beginners produce clean, simple designs in 4 to 6 weeks with 10 to 20 minutes of daily practice. Complex bridal-style work takes longer and benefits from live feedback.
Can I teach myself henna art without classes? Yes. Self-study works well for hobbyists using practice sheets, a natural henna cone, and a structured six-week routine covering the four foundational strokes.
Why did my henna stain turn out orange instead of brown? Weak stains usually trace back to old paste, skin that wasn’t clean and dry, or paste removed too early. Leaving paste on longer and avoiding water for the first several hours after removal deepens the final color.
Is it safe to use black henna? No. Black henna typically contains PPD, which can cause chemical burns and long-term allergic sensitivity. Always patch test any new henna product and confirm it’s a natural, PPD-free paste before applying it broadly.
Do I need special tools to start practicing henna? Not really. A henna cone, practice sheets or plain paper, and a glass or plastic surface for tracing cover the basics. Everything else is optional until you’re further along.
Sources
The Henna Page “HowTo” Patterns Volume 1 Teach Yourself to Henna: Elements of Henna Patterns
Henna for Beginners: Everything You Need to Know Before You Try It at Home | Your Beauty Daily
Learn Henna at Home | Beginner Henna Workbook & Practice Sheets – STAINED By Wardah
Learn Beautiful Henna Art (Mehndi / Natural Tattoos) — Udemy
Recommended
Comments