Finger Henna Designs for Easy, Minimal Looks
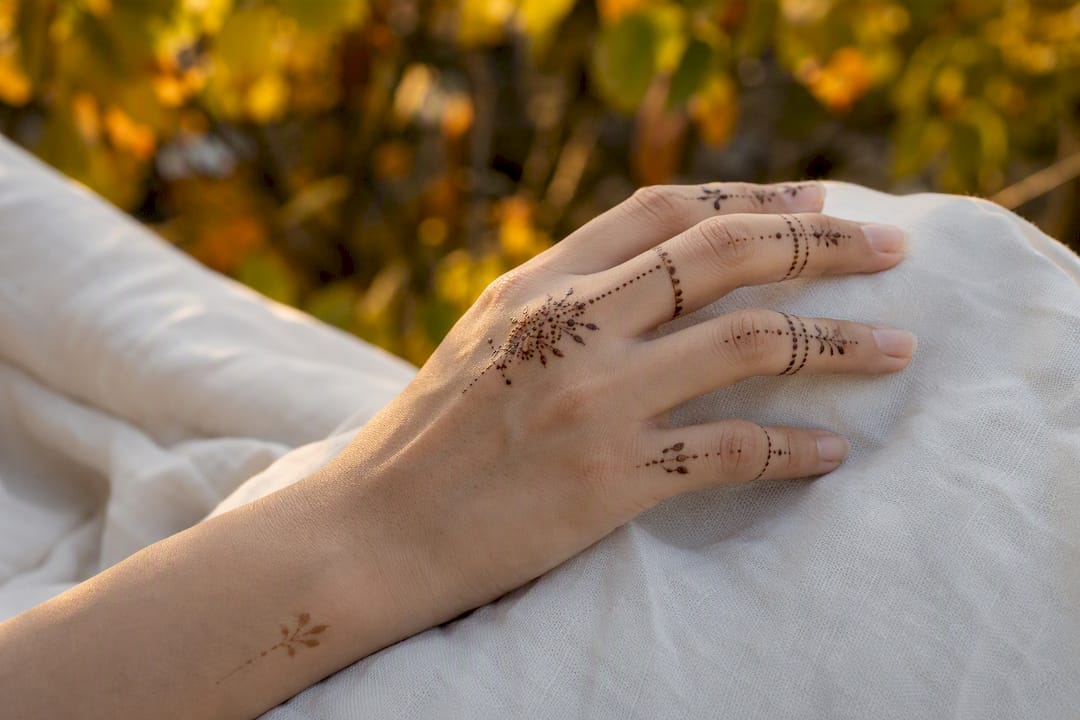
Bands, filled tips, a single vine, and a dotted chain are the four finger henna designs that come out looking clean even on your first try. All four usually take a few minutes per finger. Start with a fine cone tip, apply light and even pressure, and let the paste sit undisturbed for two to three hours before you touch anything.
Try your index and ring fingers first. They have the flattest surface, so lines stay steady.
Skip the thumb until you’ve done a few fingers. The curve there trips up most beginners.
Key Takeaways
Minimal finger henna designs succeed because thin cones, steady pressure, and full drying time matter more than artistic skill.
Point | Details |
Start with easy patterns | Bands, filled tips, and dotted chains take one to two minutes per finger and forgive small mistakes. |
Use a fine cone tip | Thick cones make every finger pattern harder to control and cause smudged lines. |
Dry patiently, skip heat | Let paste sit two to three hours and avoid hair dryers, which crack the design before it stains. |
Avoid black henna | Skip any product marketed as black henna since it often contains PPD, a known skin irritant. |
Learn hands-on with Hennaforfun | Hennaforfun offers private lessons and beginner cones for readers who want real feedback beyond photos. |
Where to Find More Finger Henna Inspiration
Beginner finger mehndi galleries for design inspiration and trend context.
Fingertip technique guides for step-by-step application tips.
Large design collections for browsing dozens of styles at once.
Stock photo libraries for clean, well-lit reference images.
Always check that any henna paste you buy lists natural ingredients only, and skip suppliers who won’t confirm what’s in the mix.
Table of Contents
What Do Simple Finger Henna Designs Look Like?
Minimal finger mehndi is the dominant look for beginners heading into 2026, and for good reason: small, jewelry-like patterns finish fast, photograph well, and hide small mistakes better than a full hand does. Below are eight styles worth knowing before you pick up a cone.
Classic bands: One or two thin rings around the finger. Easy. Works for casual wear and office settings.
Filled tips (cap style): The fingertip colored solid, like a manicure. Easy. Great for weddings and festivals.
Leafy vine: A single curved line with small leaf shapes branching off. Intermediate. Suits casual outings and photoshoots.
Dotted chain: A row of evenly spaced dots running up the finger. Easy. Flexible for any occasion, including office wear.
Single flower: One small bloom near the knuckle or fingertip. Intermediate. Best for weddings and celebrations.
Tribal chevron: Angled V-shapes stacked like a zigzag. Intermediate. Fits festival and boho-styled events.
Jaali (net pattern): A crosshatch of fine lines forming a lattice. Intermediate. A striking choice for weddings.
Cuticle half-moon: A crescent shape hugging the base of the nail. Easy. Subtle enough for daily wear.
Trend roundups for 2026 point to clean lines and small floral accents as the styles most beginners are gravitating toward, which lines up with why bands and dotted chains show up in nearly every finger mehndi gallery worth bookmarking. If you want a visual reference before you draw anything, browse a stock image library for consistent, well-lit photos of each style rather than pulling from random social posts, where lighting and angle can make a pattern look far more complicated than it actually is.
Pro Tip: Pair one of these finger-only patterns with a single small accent on the wrist or palm. It reads as intentional rather than incomplete, a combination several finger mehndi galleries recommend for a balanced, modern look.
How to Draw Six Easy Finger Henna Patterns
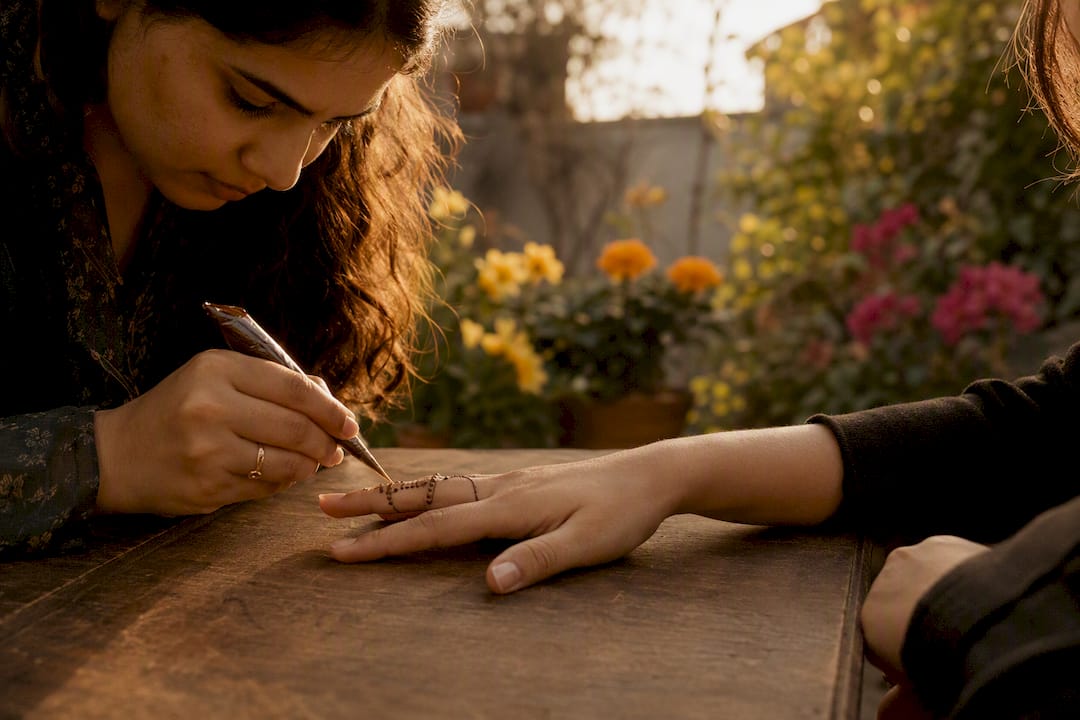
Each pattern below takes one to five minutes per finger once you’ve practiced it two or three times.
1. Classic bands (easy, 1 minute per finger) The finished look is a slim ring or two circling the finger like a stacked ring.
Rest your hand flat on a table for stability.
Circle the cone tip around the finger in one smooth motion.
Leave a small gap, then add a second thinner band if you want a layered look.
2. Filled tip (easy, 2 minutes per finger) The tip looks solidly colored, like a dipped manicure.
Outline the tip from the first knuckle up.
Fill in the outline with short back-and-forth strokes.
Smooth any gaps with the cone’s tip while the paste is still wet.
3. Leafy vine (intermediate, 3 minutes per finger) A single curving stem with tiny leaves gives a natural, hand-drawn feel.
Draw one wavy line up the side of the finger.
Add small teardrop leaves branching off every quarter inch.
Keep the stem thinner than the leaves for contrast.
4. Dotted chain (easy, 1 minute per finger) Evenly spaced dots run in a straight or curved line.
Mark your starting and ending points mentally before you begin.
Press the cone gently and lift straight up for each dot.
Keep spacing consistent by counting a beat between dots.
5. Single flower (intermediate, 4 minutes per finger) One small five-petal bloom sits near the knuckle.
Draw a tiny center dot.
Add five small petal loops around it.
Finish with one or two leaf accents beside the stem.
6. Jaali net (intermediate, 5 minutes per finger) A crosshatch of fine diagonal lines covers the finger like lace.
Draw diagonal lines spaced evenly across the finger.
Cross them with lines running the opposite direction.
Add a small dot in each diamond gap for detail.
Pro Tip: Most beginner mistakes come down to loading the cone too full or pressing too hard. Practitioners recommend working with fine, consistent lines and following the natural curve of the finger rather than fighting against it. Practice steady pressure on paper first. Your hand will thank you when it’s time to draw on skin.
Materials and Safety Basics for Finger Henna
You need less gear than most people expect. A fine-tipped henna cone is the one non-negotiable, since a thick tip makes every pattern above harder to control. Beyond that, gather a ready-made henna paste or powder to mix yourself, an optional stencil for perfectly even shapes, and a toothpick or cotton swab for quick fixes.
Fine-tipped cone (the single most important tool for finger work)
Natural henna paste or powder, mixed fresh or store-bought
Stencils for beginners who want guaranteed symmetry
Toothpicks or cotton swabs for cleanup and small corrections
When shopping, check labels for natural ingredients and skip anything that doesn’t list henna plainly. Pre-mixed paste is convenient, but fresh-mixed paste often stains darker if you have the time to prepare it a few hours ahead.
Never use so-called “black henna.” It frequently contains PPD, a chemical that can cause severe allergic reactions and chemical burns. Do a small patch test on your inner wrist and wait 24 to 48 hours before applying any new henna product to your fingers.
Beginners often start with a handmade henna cone built specifically for fine detail work, and a DIY stencil set if steady freehand lines still feel out of reach.
How Long Does Finger Henna Last, and How Do You Make It Darker?
Finger henna stains typically look orange right after you remove the paste, then deepen over time as the pigment oxidizes. On fingers specifically, expect the color to fade within about a week or slightly longer, faster than a palm stain, since fingers see more washing and friction.
Do let the paste dry naturally and leave it on for two to three hours minimum, per guidance from mehndi artists.
Do dab on a lemon-sugar mix once the paste is dry to help it stay put longer.
Don’t rinse with water for about 12 hours after removing the paste.
Don’t use a hair dryer or heat gun to speed drying. It cracks the paste and weakens the stain.
Pro Tip: Scrape off dried paste with a dull edge instead of washing it away. Washing too early is the single biggest reason for a patchy, uneven stain. If one finger comes out lighter than the rest, it usually means the paste dried and flaked off early there.
What Does Finger Henna Symbolize?
Finger henna shows up at weddings, festivals, baby showers, and plenty of ordinary weekends where someone just wants a bit of temporary adornment.
Weddings and engagement celebrations
Festivals and cultural holidays
Baby showers and pregnancy celebrations
Casual, everyday decoration
For many wearers, a finger pattern works like jewelry: decorative, celebratory, temporary. If you’re borrowing a motif from a tradition outside your own, take a moment to learn its context rather than treating it as a pure fashion accessory.
Where to Learn Finger Henna Beyond a Gallery Scroll
Photos get you inspired. Cone control comes from practice and, ideally, a little guidance from someone who has drawn thousands of these patterns.
Private or small-group lessons for hands-on cone control feedback you can’t get from a tutorial video.
DIY kits and cones for practicing at your own pace at home.
Booked event artists for weddings, showers, or parties where you’d rather sit back and let someone else handle the details.
Years of teaching henna technique in person, from casual home gatherings to structured classes, tends to surface the same beginner sticking points again and again: too much pressure, an overloaded cone, and rushing the drying time.
Ready to move past guesswork? Book a private lesson or pick up a starter cone and start practicing this week.
Quick Drying Techniques for Finger Henna
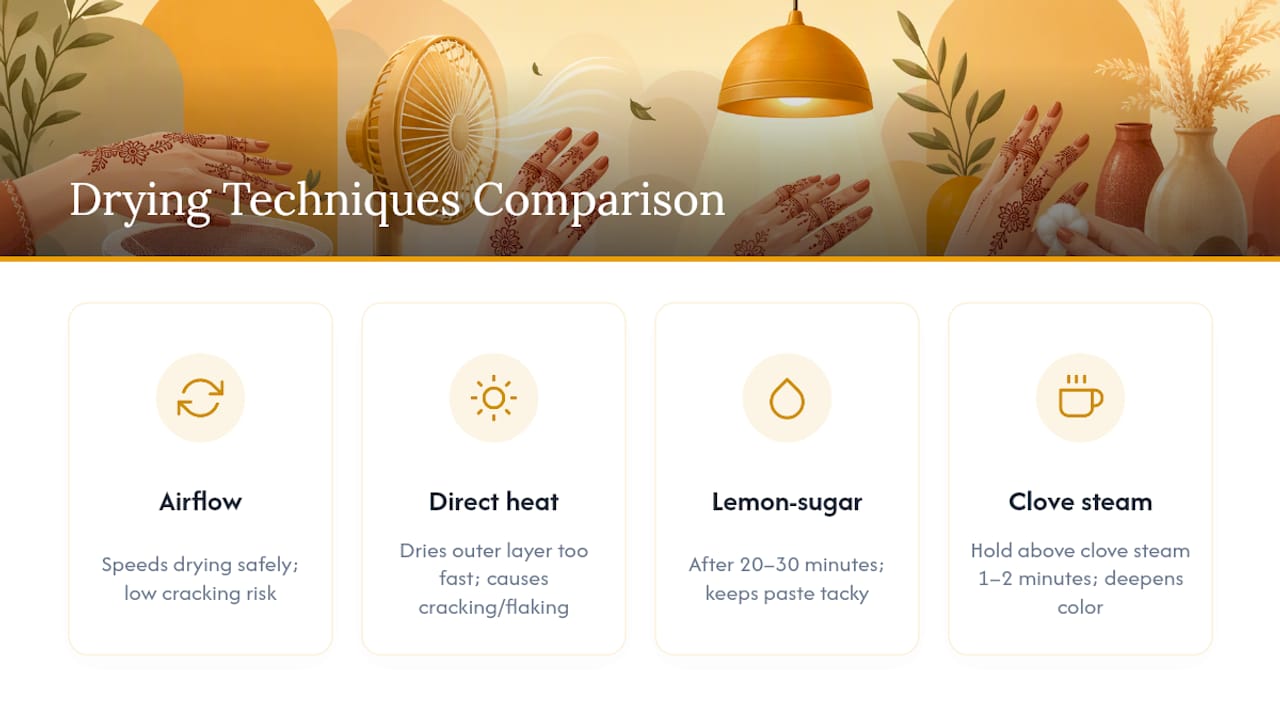
Fingers dry faster than palms simply because there’s less surface area and less paste sitting on the skin, but rushing the process still wrecks a good design. The safest way to speed things along is airflow, not heat. Sit near an open window or a gentle fan on the lowest setting, positioned so air moves across your hand without blasting it directly.
Avoid hair dryers and heat guns entirely. Direct heat dries the outer layer of paste too fast while the henna underneath stays wet, and that mismatch causes cracking and flaking before the pigment has time to bind. A cracked cone line rarely stains evenly, which is one of the most common reasons a finger design looks patchy on one side.
Once the paste feels dry to a light touch, usually within 20 to 30 minutes for a thin finger design, dab on a lemon-sugar mixture with a cotton swab. The sugar keeps the paste tacky enough to stay on longer, and the slight moisture helps the stain develop without you needing to reapply paste. Some artists use warm clove steam instead, holding the hand a safe distance above a cup of hot clove-infused water for a minute or two to deepen the eventual color.
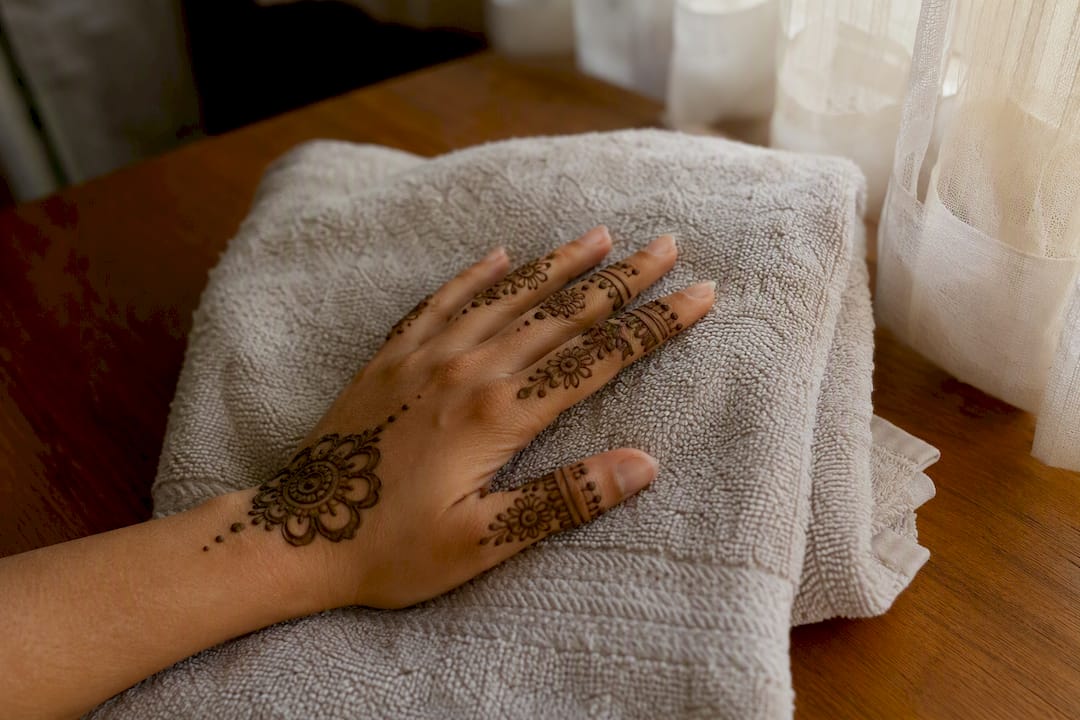
Keep your hand still and elevated while the paste sets, since gravity pulls wet paste downward and can blur a clean line into a smudge. Resting your hand on a folded towel on a table works better than holding it in the air, which tires out your arm and increases the odds you’ll bump the design.
Author’s Note: Why We Favor Minimal Finger Designs
We keep coming back to finger-only looks because they’re fast to draw, easy to redo if you mess up, and they photograph beautifully without needing a single other inch of henna on your hand.
Ready to Try Finger Henna Yourself?
Reading about cone pressure only gets you so far. Hennaforfun runs private and small-group lessons where you get real-time feedback on your hand angle and cone control, the two things no tutorial photo can teach you. If you’d rather practice solo first, our handmade cones are built with the fine tips that make bands, dotted chains, and vines actually look clean on skin instead of smeared.

We teach lessons and take bookings around Kirkland, Bellevue, and Snohomish, Washington, alongside our online shop that ships DIY kits anywhere. If you’re new to henna entirely, our DIY henna kit bundles paste, cones, and stencils so you’re not guessing what to buy first. Ready to get your hands moving? Book a private lesson this month or grab a beginner cone and start practicing tonight.
Frequently Asked Questions
How long does finger henna typically last? Most finger henna stains fade within about a week or slightly longer, shorter than palm or wrist henna because fingers get washed and rubbed more often.
Can I use stencils for finger henna designs? Yes. Stencils help beginners get symmetrical bands, dots, or chevron shapes without needing precise freehand cone control.
What’s the biggest mistake beginners make with finger henna? Overloading the cone. Too much paste pressure produces thick, uneven lines, and artists consistently point to fine, controlled strokes as the fix.
Is black henna safe for fingers? No. Black henna often contains PPD, which can trigger serious allergic reactions. Stick to natural henna and always patch test first.
Which finger is easiest to practice on first? The index or ring finger. Their flatter surface makes it easier to keep lines straight compared to the curved thumb.
Sources
Recommended
Comments