Quick Feet Henna Designs: 5 Easy Patterns in 10–30 Minutes
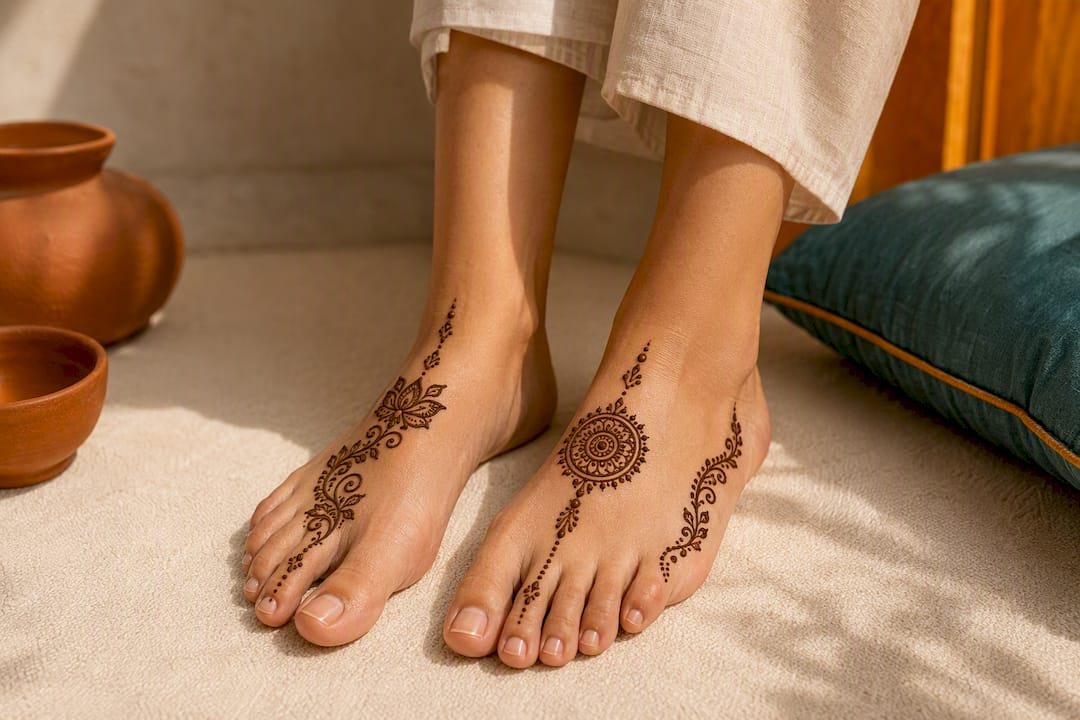
For quick, flattering foot mehndi, choose from anklet-style chains, toe accents with negative space, floral vine trails, a centered mandala, or full-foot jaal coverage. Anklets and toe accents suit beginners and everyday wear. Mandalas and jaal work best for bridal or festive occasions. The right pick comes down to how much time you have and how much foot you want covered.
TL;DR:
Anklet-style chains can be completed in less than 30 minutes, making them perfect for quick, everyday designs or beginner practice.
Full-foot jaal designs require up to three hours for symmetrical coverage, mainly suited for wedding receptions and formal events.
Proper aftercare, including long paste contact and sealing with lemon-sugar, is essential to achieve deep, lasting stains that can persist for one to two weeks.
Table of Contents
Feet Henna Designs at a Glance: Which Style Fits Your Occasion
Every feet henna design falls into one of five visual families, and knowing them upfront saves you from scrolling through hundreds of photos without a plan. Some scream “wedding,” others work for a Tuesday.
Mandala centerpieces. A circular focal design sits on the top of the foot, often radiating petals or geometric spokes toward the toes and ankle. This is the go-to for bridal feet henna because it photographs beautifully in bridal sandals and reads as intentional even from across a room. Detailed mandala versions can take from under an hour to about one and a half hours to apply.
Anklet-style chains. These wrap the ankle like jewelry, sometimes with a delicate strand running down toward the big toe. They mimic an actual anklet, which makes them perfect for anyone who wants a permanent-looking accessory without buying one. Fast to apply, typically taking less than half an hour.
Floral and vine trails. A single vine climbs from the ankle across the top of the foot, sprouting small leaves and flowers along the way. This family is the most versatile of the group. It works for casual events, everyday henna, or as a subtle bridal option, and Times of India’s roundup of trending mehndi styles notes that vine and Arabic floral patterns are among the most requested combinations right now.
Toe accents and negative space. Rings around individual toes, a dotted border, or a single motif left mostly blank in the middle. This is the fastest option on the list and the most forgiving for first-timers, as a few clean toe rings can be done quickly.
Full-foot jaal. Dense, net-like coverage across the entire top of the foot, often extending up the ankle. Traditional feet mehndi for weddings frequently uses this style because it fills the most visual real estate. A curated gallery of feet mehndi styles puts full jaal application time at the higher end, sometimes reaching close to three hours for a symmetrical two-foot design.
If you’re deciding between simple henna patterns and something more intricate, let the occasion decide. Brunch with friends calls for anklets or toe accents. A wedding or festival calls for mandala or jaal.
How to Draw 5 Easy Henna Designs for Feet
You don’t need years of practice to produce something that looks good in photos. These five motifs are the ones henna artists teach first because they build the muscle control needed for anything more complex.
Minimalist anklet. Draw a thin line circling the ankle, then add small evenly spaced dots or tiny triangles along it. Four steps: base line, dot spacing, fill, clean edges. Ten minutes, beginner level.
Single mandala. Start with a dot in the center of the foot, ring it with small petals, then add a second larger ring of petals or lines outward. Five steps: center dot, inner ring, outer ring, connecting lines, border dots. Thirty minutes, beginner to intermediate.
Toe lace. Outline each toe with a thin curved line resembling lace trim, then connect two adjacent toes with a small linking motif. Four steps: outline, connectors, fill-in dots, edge cleanup. Fifteen minutes, beginner level.
Vine trail. Draw one continuous wavy line from the ankle to the base of the toes, then branch off small leaves and three-petal flowers at intervals. Five steps: main stem, branch points, leaves, flowers, fill dots. Twenty-five minutes, intermediate.
Side foot panel. Sketch a vertical strip along the outer edge of the foot filled with repeating small triangles or paisleys. Four steps: border lines, motif repetition, connecting dashes, tip details. Twenty minutes, intermediate.
Practice each motif on paper first before touching skin. Loading a cone with the right consistency takes trial and error, and WikiHow’s henna application guide recommends steady, slow pressure rather than squeezing in bursts.
Pro Tip: A DIY stencil takes the guesswork out of spacing symmetrical motifs like mandalas, and a piping bag with a tiny cut corner gives you the same control as a professional cone without the learning curve.
Where to Place Henna on Your Feet for the Best Look
Placement changes how a design reads in photos and how comfortably it holds up in shoes. A few rules make the difference between a design that flatters and one that fights your footwear.
Top-of-foot designs (mandalas, jaal) show best with strappy sandals or barefoot shots, since closed shoes hide most of the work.
Ankle and side-of-foot placements pair well with heels, where the strap naturally frames the design instead of covering it.
Toe accents work with almost any shoe, including flats and sneakers, because they sit at the very front of the foot.
Narrower feet tend to suit vine trails that elongate the foot visually, while wider feet often look more balanced with a centered mandala that draws the eye inward.
Avoid placing explicit religious symbols on the soles of the feet or in configurations that could read as disrespectful. Brides’ guide to wedding henna flags this as a real consideration across cultures, not just a stylistic footnote.
If jewelry pairing matters for your event, an anklet-style design can double as a statement piece on its own, similar to the layered looks in bridal anklet styling ideas.
Getting Henna to Stain Well on Feet
Feet take henna differently than hands, largely because the skin is thicker and sweats more, which affects both how deep the stain goes and how long it survives.
Leave the paste on for several hours, often overnight, since longer contact time deepens the stain more reliably than a quick 30-minute application.
Seal the design with a lemon-sugar mixture dabbed lightly over the dried paste to help it stay put without cracking.
Avoid water for roughly 24 hours after scraping off the dried paste, since early contact with water can fade the color before it fully develops.
Expect a darker, longer-lasting stain than you’d get on hands in some cases, since callused areas of the foot can hold color differently. Brides notes that a deep, long-lasting stain is traditionally read as a good omen for brides, which is part of why aftercare gets so much attention before weddings.
Plan for sweat and friction. If you’re wearing closed shoes right after application, the design is more likely to smudge before it sets.
A well-cared-for feet henna design typically holds strong color for one to two weeks before it starts fading, with faint traces sometimes visible for longer depending on skin type and how often the area gets washed.
Why Learning From a Henna Artist Beats Copying Photos Alone
Photos are a great starting point, but they don’t teach you cone pressure, paste consistency, or how to fix a wobbly line mid-design. That’s the gap Hennaforfun’s offerings are built to close.
Private and group henna lessons in the Kirkland, Bellevue, and Snohomish area walk you through real motifs with hands-on correction, not just a video to pause and rewind.
DIY henna stencils give beginners a symmetrical guide for mandalas and jaal patterns without needing years of freehand practice.
Pregnancy henna sessions apply the same design principles covered here, adapted for maternity photoshoots and belly art.
Event experience across weddings, wineries, and private parties means the design families in this guide get tested on real feet, not just illustrated for a blog post.
If a gallery photo caught your eye but you’re not sure how to recreate it, a stencil or a lesson closes that gap faster than trial and error.
What Most Henna Guides Get Backwards
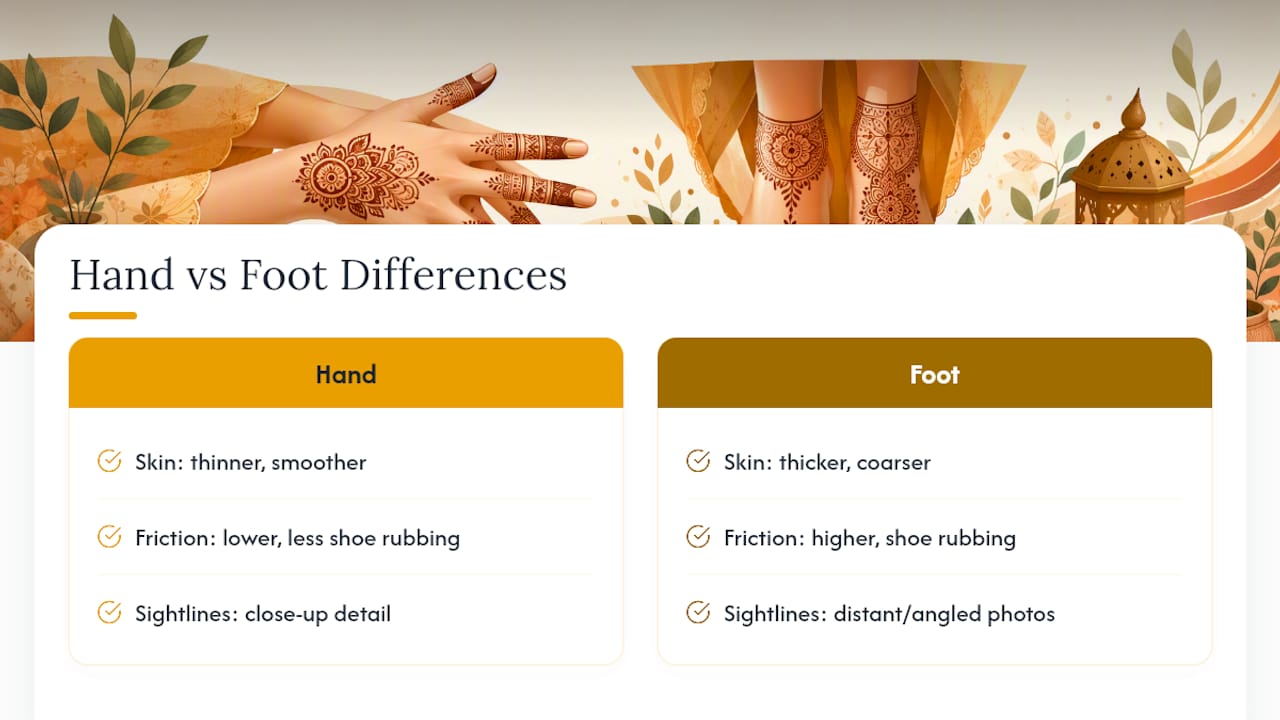
Most guides treat feet henna as an afterthought to hand mehndi, a smaller version of the same idea. That’s backwards. Feet have different skin texture, different friction points from shoes, and different sightlines in photos, which means a design that looks perfect on a hand can read as cluttered or uneven on a foot.
The bigger issue is that most inspiration galleries lead with the most intricate bridal designs, which quietly convinces beginners that anything simpler isn’t worth doing. It’s the opposite. A clean anklet chain or a few well-placed toe rings, done with steady lines and good paste consistency, photographs better than an ambitious mandala rushed through in twenty minutes. Skill shows in cleanliness, not complexity.
If you’re new to this, master one motif family completely before moving to the next. A vine trail you can draw confidently beats a jaal pattern you’re still fighting through halfway. Save the full-foot bridal designs for when your hand is steady enough to enjoy making them.
— Angana
Ready to Book Your Feet Henna Experience
Skip the trial-and-error and get a design that actually looks the way the photo did. Hennaforfun turns the design families covered here into a real appointment, a lesson, or a ready-to-use product, so you’re not stuck freehanding a mandala with a shaky cone the night before an event.

Here’s where to start depending on what you need:
Book a private or group henna lesson to practice these motifs with an artist correcting your line work in real time.
Grab a handmade henna cone if you want to apply your own design without mixing paste from scratch.
Check the calendar of upcoming events for winery nights and group sessions where you can get feet henna done professionally.
Explore pregnancy henna services if you’re marking a maternity milestone with a personalized design.
Booking takes a few minutes, and most sessions can accommodate a design straight from this guide, whether that’s a quick anklet chain or a full bridal mandala.
Where to Find More Feet Henna Inspiration
A few sources go deeper than a single gallery scroll and are worth bookmarking alongside this guide.
Brides’ wedding henna roundup for bridal-specific design examples and cultural etiquette notes.
Times of India’s mehndi trend feature for a look at current style blending and minimalism.
NewMehndiDesign’s feet gallery for a wide range of photos sorted by style and complexity.
WikiHow’s henna basics guide for foundational application and aftercare steps.
Hennaforfun’s minimalist henna gallery for more beginner-friendly patterns to practice.
Sources
Recommended
Comments